Showing posts with label Main Dish. Show all posts

Wednesday, December 31, 2014

Elegant Turkey Casserole

Elegant Turkey Casserole
     Well my last post of the year. Can't believe it's going to be 2015 tomorrow! When I was a kid I always use to hear the adults saying that time is flying by. I never quite got it as a kid, but now I do.

     Anyways, I thought I'd post this recipe to end out the year. It's a recipe that I usually make after we've made a turkey, but chicken could easily be used to make this as well. It is an expected dish the next day following a turkey dinner.

     This casserole has a tangy sweet flavor and the salty chips just adds a little something to make it delicious. I never, ever have leftovers with this one. The recipe asks for water chestnuts and I try to make a point of putting them in. It gives it a little bit of crunch and no one seems to mind, not even the picky eaters. I don't always have the slivered almonds for this so one can easily leave them out and it will still taste great.

    So here's to a Happy New Year! Hope the upcoming year is a great year for everyone!

Elegant Turkey Casserole
Mix all ingredients together and put in buttered 9X13 pan. Top with 2 cups crushed potato chips. Bake 45 minutes at 350 degrees.

2 cups chopped chicken or turkey
1/4 teaspoon salt
1/4 cup green pepper
1/2 cup mayo
1 can cream of mushroom soup
3/4 cup cheddar cheese
2 cups chopped celery
2 tablespoons chopped onion
1 tablespoon worchestershire sauce
2 tablespoons lemon juice
1/2 cup slivered almonds
1/4 cup water chestnuts

Thursday, October 16, 2014

Crockpot Beef Stew

Beef Stew
     Well I'm on Fall break. At least that's what my students are calling it. The kids get the whole week off and us teachers are doing training and conferences the first part of the week. I was wise and scheduled all my conferences today for the morning so I had the afternoon to work on lesson plans. So now I'm all ready with my lessons for next week and I can relax and just chill for the next 4 days.

     I've got a lot of plans for the next 4 days. First off I'm planning on sleeping in a bit. I haven't slept in for quite some time now and I really need some extra Z's. In fact I so tired that I could probably take a nap right now, but I hate to waste any time with a nap.

     I also want to do some cake decorating this long weekend. I just bought some doll cake pans and I want to practice making some doll cakes. They should be pretty easy to do. I think I'm going to make a bride and some bridesmaids with a fall theme of course.

    One other thing that I want to do is some quilting. I've got a black and white quilt that is sandwiched and ready to be quilted. Now all I've got to do is sit down and do some serious quilting on it. It shouldn't take too long. In fact I should be able to get it done over the weekend if I do a little bit every day.

     While I'm doing all these things I'm thinking that making some meals in the crockpot is probably a must. I love when I can just throw everything in the crockpot and let it do its thing. This recipe that I'm sharing today is one of those perfect recipes for just that. I made this a couple weekends ago when I was on the run. I just put it all in the crockpot and went about my business and when dinner time came it was ready. It's a great fall/winter meal that everybody will love.

Crockpot Beef Stew
3 carrots, slice
2 potatoes, cubed
2 lbs stew meat, cut into bite size pieces
2 C water
2 beef bouillon cubes
1 t Worcestershire sauce
1/2 t garlic powder
1 bay leaf
1/4 t salt
1/2 t pepper
1 t paprika
1 large onion, chopped
2 celery ribs, sliced

2T cornstarch
1/3 C cold water

Combine all ingredients in crockpot except cornstarch and 1/3 cup water. Mix well. Cover. Cook on low 8 hours. Once stew is cooked dissolve cornstarch and 1/3 cup water. Stir into meat mixture. Cook on High until thickened, about 10 minutes. (If you don't have cornstarch you can substitute 1/4 cup flour.)


Tuesday, September 30, 2014

Sweet and Sour Chicken

Sweet and Sour Chicken
    Oh it's been a busy month. With helping my mom out and school starting again I haven't had time for much of anything. I'm even having a hard time fitting the gym in these days. I am, however, hopeful that things will start being less hectic and I can get to some real cooking and baking not to mention sewing and quilting.

     I love the fall months for making those home cooked meals. There is something about a nice hot meal when you get home from work or a good hearty Sunday supper. I also don't mind a sweet treat every now and then either.

     Well I happen to make some time yesterday to make one of my favorites,sweet and sour chicken. It is fairly quick to make and doesn't require a lot of ingredients. I could just gorge myself on this stuff. I did have self control this time and saved some to take for lunch the next day.

     This recipe makes enough for a family of four with perhaps a little left over for those that would take some for their lunch the next day. I always serve it with rice, which I make in my rice cooker. Usually I cut the green pepper into smaller pieces, but I was in a super rush so they got a little chunky. Oh well, it still tasted great!

     Hope you enjoy this one and hope to be posting a little more regularly.

Sweet and Sour Chicken
2-3 boneless, skinless chicken breast
1 T oil
1 can (20oz) pineapple chunks
1/3 C water
3 T vinegar
1 T soy sauce
1/2 C brown sugar
3 T corn starch
1 large green pepper, cut into small chunks
Hot cooked rice

Cut chicken into bite size pieces and cook in oil. Set chicken aside. Drain pineapple, reserving juice. Set pineapple aside. Add water to juice to measure 1 cup; pour into a large skillet. Add 1/3 c water, vinegar, soy sauce, brown sugar, and cornstarch; stir until smooth. Cook over medium heat until thick, stirring constantly. Add pineapple, chicken and green pepper. Simmer, uncovered for 20 minutes or until heated through. Serve over rice.

Saturday, March 15, 2014

Homemade Manwich

Homemade Manwich
     I can finally feel spring in the air. This past week has been a glorious week. The sun, for the most part, has been shining and working on melting that snow. The temperatures have pushed the 50's a couple of times this week too. I can finally see grass out in the backyard and the ducks have been gathering on the pond again.

     Since the weather has been so nice this week I have been starting on my regular routine of walking the dogs around the block again. Now I just need to keep this routine going next week. See I've been on spring break this past week and Monday is back to school for me. I'll have to start getting up to the alarm clock and throwing my sweats on to get the dogs out the door and on their walk before I have to hit the shower. It's a great way to start the day, especially now that the temps are getting warmer.

     In anticipation of the warmer weather I have been in the mood for more summer type food. I decided that I wanted to spice up my sloppy joe recipe a bit, so I went in search of a recipe. I found one that reminds me of Manwich. You know, that canned mix that you just add to cooked ground beef? Well I think this recipe is even better.

     I had to change the recipe slightly, but I think it still tastes really good. Now my kids still like my original recipe for sloppy joes, but they thought these were really good too.

Homemade Manwich
1 lb of ground beef
1/2 medium onion, diced
1- 14.5 oz diced tomatoes, drained
1/2 C ketchup
1/2 C Sweet Baby Rays barbeque sauce
3 T Worcestershire sauce
1/2 t garlic powder
1/2 t ground cumin
1/2 t chili powder
1/4 t paprika
hamburger buns

In a skillet brown the hamburger and onions until the beef is cooked through. Drain the meat mixture. Add the drained tomatoes, ketchup, barbeque sauce, Worcestershire sauce and spices. Stir well and cover and cook on low heat for about 15 minutes. Stir occasionally. Uncover and cook on low for about 5 minutes or until the mixture thickens up. Serve on hamburger buns.

Adapted from Big Mama's Home Kitchen

Saturday, January 25, 2014

Queso Chili

Queso Chili

     January has proven to be a month that just isn't going to budge on the idea of warmer weather. It doesn't seem to matter where one lives in the U.S. it is cold. Not just a little cold, but a deep freeze cold. The wind chill here has been in the -40's. Not fun!

     School has already been cancelled 3 days because of the extreme wind chills. I'm wondering if we will be closed again on Monday and Tuesday too. The wind chills are suppose to be worse than the last few days when school was cancelled. At this rate we'll be making time up in June. Something I'm not too happy about.

     Since it's been so cold out I've had to make some chili to warm us up some. In fact I've made this particular chili 2 times now.  My husband says that it tasted better the second time I made it, but I didn't do anything different from the first time. I guess it just must have been that he was more in the mood for chili the second time I made it. My son absolutely loved it both times. I like it because it's a little different from your average chili and you just throw everything in the crockpot. So simple.

     So make yourself a big pot of chili tonight. I know that the old month of January will cooperate with giving us cold winds and temperatures and this dish will warm you up . Enjoy!

Queso Chii
1 lb of Velveeta cheese, cubed
1 lb ground beef, browned
1 C frozen corn
1-15 oz can of kidney beans, undrained
2-14.5 oz cans diced tomatoes, undrained
1- 4oz can of green chilies
1 package of taco seasoning mix
Corn chips

Combine Velveeta cheese, ground beef, corn, beans, diced tomatoes, green chilies and taco mix in a crockpot.
Cover and cook on high for 3 hours.
Serve in a bowl with crushed corn chips on top if desired.


Sunday, January 5, 2014

Homestyle Goulash

Homestyle Goulash
     As we prepare to hunker down at home for these next couple days I've had to start thinking about some good home cooked meals that will warm a persons soul. With the temps dropping and businesses potentially closing, it looks like most of us will be staying home getting some good quality family time together.

     Last night for dinner I made goulash. This is a quick, hearty meal that warms one up and just feels like home. It's the stuff my mom would have made for a quick family dinner. Add a salad and rolls/biscuits and you've got a great satisfying meal.

     One nice thing about goulash is you can add practically anything to it and you can't mess it up. I could have added some canned mushrooms to this if I wanted to. Or if you like a little spice, add some red pepper flakes or some Italian seasoning. Substitute a little jarred spaghetti sauce for the tomato sauce to give it a little Italian flare. You just can't go wrong with this recipe.

     If you happen to have leftovers just put them in the fridge and heat them up in the microwave for a take to work lunch or just a quick lunch at home.

Homestyle Goulash
1 lb of lean ground beef
1 small onion, diced
2 cloves of garlic, minced
1/2 green pepper diced
1- 15 oz can diced tomatoes
1- 8 oz can tomato sauce
2 C dry macaroni, cook according to package directions
salt and pepper to taste
1/2 C shredded cheddar cheese

Bring a large pot of water to a boil and cook the macaroni. It should boil about 8-10 minutes. As the macaroni cooks brown the beef, with the onion, pepper and garlic. Drain the beef mixture and set aside. Once the macaroni has cooked drain it in a colander. Return macaroni to the pot and add the beef mixture. Add the diced tomatoes, tomato sauce, salt and pepper (if you're doing any add ins now is the time to put those ingredients in). Mix well. Heat on low heat and then add the cheese and stir to melt the cheese. Now serve and enjoy!

Adapted from Lynda's Recipe Box

Wednesday, January 1, 2014

Chicken and Wild Rice Soup

Chicken And Wild Rice Soup
     Happy New Year!!!
     Well another year is behind us and we are looking at a new year. Time to reevaluate our life and try and make some changes that are for the better. Some of us want to make changes to exercise more, or to just exercise period. Some of us want to save more money and spend less, simplifying our lives. And then some of us want to eat better. So many resolutions. Hopefully some of the things we want to change will become a reality.

     I really want to eat better and save some money so I can go on a trip somewhere. Not that I haven't done these things before, but I just want to make a point of really watching what I eat and making sure I put money aside every paycheck so I can afford to go on a nice trip this year. 

     As far as exercise goes, I'm going to make sure that I go to the gym 3 times a week and really work out. No more wimpy exercising. I'm going to make sure I work out for at least 30 minutes when I do go to the gym. Plus I'm going to make sure I do yoga once a week. It's so easy to get out of the habit of regular exercise.

    So to start my better eating I've made a Chicken and Wild Rice soup recipe that I think you're going to love. It is made in the crockpot, which makes it super easy. I wasn't so sure how the wild rice would cook, but it was very easy. It doesn't take much to whip this soup up and my family liked it better than my usual wild rice soup.

So here's to a New Year! Hope you all have a wonderful 2014!

Chicken and Wild Rice Soup
8 C of chicken broth
1 C uncooked wild rice
1 T olive oil
1 medium onion, chopped
2 rods of celery, sliced
2 carrots, shredded
1/2 t pepper
2 C cooked, diced chicken
1 stick of butter, melted
1/2 C flour
2 C half and half
2 t parsley 
Siracha sauce, if desired

Add chicken broth and rice to crockpot and turn on high. In a frying pan add olive oil and heat on medium heat. Add onion, celery and carrots and saute until cooked. Add the pepper to the vegetables.  Add to the rice and broth mixture. Cook on high for 3-4 hours or on low for 6-8 hours.
Cook the chicken. ( I took 3 chicken breasts and boiled them until done. About 20-30 minutes). Cut chicken up into bite size pieces and put in the refrigerator for later.
In a small sauce pan melt butter. Add the flour and stir completely in. Then slowly add the half and half, mixing well. Add this to the crockpot mixture along with the chicken and the parsley. Mix well.
Let soup cook for another 20-30 minutes and serve.
Add Siracha sauce to individual bowls if desired.

Adapted from Simply This and that


Thursday, November 21, 2013

Chicken Lo Mein

Chicken Lo Mein
     Ooops! I said I was going to get this recipe posted on Wednesday and it just never happened. But here it is. Better a day late then not at all.

     I've just been so busy with the end of the trimester at school that I'm either correcting papers like a mad woman or entering data into the computer. I've been coming home exhausted which doesn't help since I'm running errands after work just about every night. Not to mention my attempts at trying to get to the gym 3 times a week to work out. Things just need to slow down some.

     Well at least this dish is quick and easy to make especially on a very hectic night. It doesn't take much time to make and I think that you could play with the ingredients a bit to make it the way you like.

     After I made this I thought that a can of mushrooms would be good in this. I also thought stir frying some carrots would be good too. I think you could mix it up with just about any kind of vegetable that you like or happen to have on hand.

     The original recipe called for lo mein noodles, which I didn't have so I used spaghetti noodles instead. It also called for fresh ginger root. I also did not have any of that either, so I just used some ground ginger. I used fresh pea pods instead of frozen and added some red onion to it too. Don't be afraid to mix it up a bit.

     Well here's the recipe I promised. Hope you enjoy it.

Chicken Lo Mein
8 oz spaghetti noodles
2 T oyster sauce
1/4 C soy sauce
1/2 C chicken broth
1 t cornstarch
Red pepper flakes
1 T olive oil
8 oz chicken breast, sliced thinly
1/2 t ginger
1 small onion, quartered and sliced
3 cloves garlic, minced
4 green onions, sliced (dark green parts reserved)
8 oz fresh pea pods
Sesame oil

Directions
Cook the noodles according to package directions. Drain, toss with a few dashes of sesame oil and set aside.
In a small bow, whisk the oyster sauce, soy sauce, chicken broth, cornstarch, and red pepper until smooth; set aside.
Heat oil in a large skillet over high heat. Stir fry the chicken for 3-4 minutes or until almost cooked through. Add the ginger, onions, garlic, white and light green onion parts, and pea pods.
Cook for another 2-3 minutes until the onions are cooked to your preference, stirring frequently.
Whisk the sauce and add it to the pan, letting it boil for 1 minute before adding the noodles. Toss to coat. Top with dark green onion slices and serve.

Monday, November 18, 2013

Chicken Pot Pie

My new favorite cookbook. Check out the author.
     I just got this new cookbook and I am loving it. I have tried a few recipes and they all have been very easy to make and they have all tasted absolutely fantastic. This cookbook happens to be one of the better cookbooks that I've gotten in the mail. I always seem to have everything that I need to make most of the recipes in here. They don't really call for any weird ingredients.

     I had to laugh at the last name of the author. Who knew we'd share the same last name. I hadn't noticed it at first then one day I went to grab it off the shelf and I noticed the name. Made me laugh.

     Anyways I made the recipe in here for Chicken Pot Pie. I cut the recipe in half and I used a store bought pie crust. I also used frozen corn instead of frozen peas and it turned out to be really tasty.

     I wish we would have let it cool a little longer once it came out of the oven like the recipe says. We were so hungry we dove in. If we would have let it cool a bit the center would have thickened up a bit so it wouldn't have oozed all over our plates. Never the less it was still yummy, I just don't have any real good pictures of it. I'll add one at the end, but it's just not the best.

     I thought that one could substitute turkey for the chicken, especially since Thanksgiving is just around the corner and there is always the question of what to do with the leftovers.

     Here's the recipe and remember I've cut the recipe in half to make one pot pie.

Chicken Pot Pie
1 C peeled and diced potatoes
3 carrots peeled and sliced
1/3 C chopped onion
1/2 C (1 stick) butter, softened
1/2 C flour
3/4 t salt
1/4 t pepper
1 T chicken soup base
1 1/2 C chicken broth
3/4 C milk
 2 C cooked chicken, cubed
1/2 C frozen corn
2 pie crusts

Preheat the oven to 350.
Boil the potatoes and carrots in a large saucepan over medium heat until almost tender, about 10 minutes. Drain and set aside. In a large skillet, saute the onion and butter until tender. Stir in the flour, salt, pepper, and chicken soup base until blended. Gradually stir in the broth and milk. Cook, stirring, for 2 minutes, or until thick. Add the chicken, corn, potatoes and carrots to the broth mixture. Remove from the heat.
Place one pie crust in a glass pie plate. Lightly press along sides to form the sides and bottom. Add the chicken mixture. Put the top crust on and crimp the edges of the top and bottom crusts together. Bake for 30-40 minutes or until the crust is golden brown. Remove from the oven and cool on a wire rack for at least 20 minutes. Once pie has cooled cut and serve.
Pie can be kept in the refrigerator for up to 7 days.
Chicken Pot Pie

Monday, November 4, 2013

Garlic Bread Pizza Dough with Homemade Pizza Sauce

Homemade Pizza
    Fridayor Saturday nights around here are usually pizza nights. I didn't feel like calling out for pizza so I decide to try making my own pizza crust and pizza sauce. I've tried a few different pizza crusts and they were just never very good until now.

    This crust is made in the bread machine. I love my bread machine! You just throw everything in, plug it in, press a few buttons and you are done. The machine does all the work for you. No kneading to checking the temperature of the water so the yeast won't die. If you don't have a bread machine, seriously you should consider getting one.

     Anyways this crust is a garlic flavored crust. It also has Parmesan cheese in it. It smells divine while baking and tastes even better. The crust has such a great texture. It's not doughy nor is it crispy. It has an almost bread like quality. I know that we will be making this crust again.

Yum,yum!

     I also experimented with making my own pizza sauce, because of course I never have pizza sauce on hand unless I specifically know I'm going to make pizza. This time I was making pizza on a whim, so I need pizza sauce without having to run out and get some.

     I just used a can of diced tomatoes, tomato paste and some seasoning and tada! I had pizza sauce. Of course I had to get the blender out to puree it in, but it worked great and it even tasted better.

     As far as toppings go, put anything you like on the pizza, just remember that pepperoni goes on top of the cheese. Also I found baking the crust on a cookie sheet to work the best. I tried it on a stone and not so good results. The center of the pizza was not cooke all the way through.

Garlic Bread Pizza Dough
1 1/4 C water
3 T vegetable oil
1 t salt
4 C all purpose flour
1/4 C grated Parmesan Cheese
1/2 t garlic powder
2 T Italian seasoning
1 pkg of rapid rise yeast

Put all the ingredients in the bread machine pan in order. Make a little well in the flour for the yeast. Select the dough cycle on your machine and let it do it's thing.
Once it is done mixing remove from the pan onto a floured surface and knead it a few times. Divide into two even pieces and roll out each into a pizza. Once you have the desired size place it on your pizza pan or cookie sheet and add sauce and toppings. Bake at 400 for about 17 minutes.
Recipe from thetipgarden.com

Homemade Pizza Sauce
1-14 1/2 oz can of diced tomatoes
1- 6oz size can of tomato paste
1 t sugar
1t oregano
1 t basil
1/2 t garlic powder
1/2 t salt
1/2 t lemon juice

Combine all the ingredients in a blender and puree until smooth. Pour sauce on pizza crust and add your toppings.

Wednesday, August 21, 2013

Beef & Mushroom Braised Stew

Beef & Mushroom Braised Stew

     I just received my Taste of Home magazine last week. It has all these wonderful fall recipes that I want to make. My husband and I dogeared several pages of recipes last week when we were camping and this is just one of many recipes we wanted to try.

    Now I know the weather is not quite fall weather. In fact it has been downright steamy out. I just couldn't wait to make this. It is that comfort food that on a cold or rainy day makes you feel all warm inside. Even though it was still hot out my family gave it the thumbs up. They all really liked it.

     It is not your normal stew. This "stew" has a scoop of mashed potatoes served with it. Sounds a little weird, but it is very good.

     I changed the way it is cooked. Instead of baking it in the oven I just cooked it on the stove top. I also used stew meat instead of a chuck roast. I also used canned mushrooms and I left out the brandy and red wine. I don't think my family would have like it otherwise.

Beef & Mushroom Braised Stew
2-3 lbs stew meat
1/4 t salt
1/4 t pepper
3 T olive oil
2 -4oz cans of mushrooms
2 medium onions, sliced
2 garlic cloves, minced
1 (32 oz) beef broth
1 T tomato paste
1/4 t each dried parsley flakes, rosemary, sage and thyme
3 T flour
3 T water
Hot mashed potatoes

Sprinkle beef with salt and pepper. In a Dutch oven heat oil over medium heat: brown beef in batches. Remove from pan. In the same pan, add onions and cook until tender. Add mushrooms and garlic. and cook for about 1 minute.
Stir in broth, tomato paste and spices. Return beef to pan and bring to a boil. Turn down to a low simmer and cook for 30 minutes or until beef is cook through.
In the meantime peel and boil potatoes for mashed potatoes. When potatoes are tender enough for a fork to pierce them easily they are ready to drain and mash. Mash potatoes with a potato masher. Add milk and butter and mix with a hand mixer until smooth.
Once beef is cooked through it is time to thicken it. In a small bowl put flour in and add water. Stir together and then slowly add to beef mixture. Let it cook and it will thicken. ( I personally like to use cornstarch instead of flour. It thickens up better without getting lumpy).
Scoop potatoes into bowl and then add beef mixture.

Monday, July 29, 2013

One Pan Goulash

  
Homemade Goulash
  I wouldn't normally be making goulash in the middle of summer but these last couple of days have felt more like fall than summer. I needed some good for the soul food that warms you up and this was the ticket. Plus it was super easy to make.

     Usually I'm guilty of buying the goulash from Schwans which my family happens to really love. I decided that I wanted to make my own because homemade is so much better. Another reason for making homemade is everyone in my house is trying to really watch what they eat, so we're not buying as many prepackaged dinners.

     I found this recipe on pinterest and did a little tweaking to it to accommodate what I had in the pantry. I happen to use elbow macaroni, but I would have like to use some bigger noodles I just didn't have any in my pantry. I think you could use any kind of noodle that you have on hand.

     The original recipe called for V8 tomato juice and I didn't have any of that so I just replace it with water. Next time I'll use tomato juice or hopefully I'll have V8 tomato juice in the house.

     This meal was a hit with the family. I served it with some cheddar biscuits and it was delicious. They gobbled it up and I kept hearing how great it tasted. I know this one is a keeper. Besides its got to be cheaper than the prepackaged stuff and I'm guessing probably better for you too.

One Pan Goulash
1 lb ground beef
1/2 large onion, diced
1/2 green pepper, diced
1 8 oz can tomato sauce
1/2 C water
1 can diced tomatos (14.5 oz)
2 cloves of garlic, chopped
1/2 t Italian seasoning
1 t Lawry's season salt
1/2 t chili powder
1 bay leaf
1 C dry elbow macaroni
1 t salt
1/4 t pepper

In a large skillet combine beef, onion and green pepper. Cook over medium heat until beef is cooked all the way through. Drain off the fat.
Add tomato sauce, water, diced tomatoes, garlic, Italian seasoning, Lawry's salt, chili powder and bay leaf. Cover and continue cooking for 20 minutes.
Add macaroni and stir well. Put the lid on and cook for 20 more minutes or until the macaroni is tender. If it looks too dry you can add another 1/4 cup of water.
Add the salt and pepper.

Turn off the heat and let the liquid be absorbed. Take the bay leaf out before serving.

Monday, June 24, 2013

Over the Top Chicken Pot Pie

   
Over the Top Chicken Pot Pie
 What a beautiful day! The sun is shining, the birds are singing and there is a wonderful gentle breeze blowing. The perfect day for a bike ride. Today is actually a carbon copy of yesterday and both days I went for a bike ride.

     I am still amazed at how many people do not wear bike helmets. Sometimes I think they look at me and snicker because I'm wearing one and they think it looks ridiculous. I get it. When we were younger we never wore helmets and we were fine. I just prefer not to take that chance.

     Now I usually ride with my husband when I bike ride and he does not wear a helmet. I have tried to convince him to but he refuses to. He is one of the reasons I wear a helmet. He has several times crashed into me or run me off the path. I don't know what it is but I've learned to never ride to close to him and to anticipate his next move. lol

     Another thing that we like to do is watch the Food Network, HGTV, and DIY. We are the do it yourself kind of people. We have totally fixed up our house to our liking. Not that our house was in need of repair it just wasn't to our tastes.

     We also like to hang out at home and do our own cooking. Sure I like to go out to a restaurant every now and then, but I'm expecting some awesome food when I order. A lot of times we say to ourselves, "We could do this at home".

     So Sunday we were watching the Sandwich Kind on the Food Network and he was making this Chicken Pot Pie Sandwich. It looked amazing so I decide I could make something like that too. I wasn't going to make a sandwich though. Mine was going to be more of a biscuit smothered with this amazing chicken pot pie filling.

     Well the end result? It turned out better than I ever imagined and it was very easy to make. I used a biscuit mix that I bought at Sams Club. It's called Red Lobster Cheddar Bay Biscuit Mix. They were very good. One could always use Bisquick to make biscuits similar to these. Just follow the package directions, but add 1/2 cup of cheddar cheese to the mix.

So here's my Minnesota Morsel original Over the Top Chicken Pot Pie!

Over the Top Chicken Pot Pie
1/2 onion, diced
3 carrots, peeled and diced
1/2 C flour
1/2 C half & half
2 C chicken broth
1/4 t thyme
salt and pepper to taste
1 C frozen peas
2  cooked chicken breast, diced ( I cooked mine in my mini crock pot)

Baked biscuits

Saute the onion and carrots in olive oil until the onions look clear.
Start mixing your biscuits up and put in the oven to bake.
Add the flour to the veggies and mix well. Slowly add the half & half to the flour mixture, stirring until absorbed. Then slowly add the chicken broth stirring until well blended. This is the roux.
To the roux add the thyme, salt and pepper, frozen peas and chicken. Mix well and heat it thoroughly.
Take the biscuits from the oven and place two on a plate and cover with heaping spoonfuls of the chicken pot pie and serve.

Thursday, June 13, 2013

Oven Baked Chicken Fajitas

Oven Baked Chicken Fajitas
      My son has graduated from college this year! His major? Law enforcement. He currently is taking his skills class which will finish up at the end of June and then he'll come back home and get prepared to take his POST test to become a police officer.

     It's all a process to become a police officer. Most people think that you just graduate from college and poof! You're ready to work as a police officer, but it just doesn't work that way.

     There are a lot of steps to take to actually becoming a police officer. One has to first be certified as a first responder. Then there's the background check and the traffic violations check. All this and the college credits earned must then be submitted to the department head to sign off on before the POST test can be taken.

     There were other things that he needed to do like take a class on DWI training, learning how to drive a squad car, learn how to clear a building and shooting a gun. Of course all these classes have technical names that I don't know, but regardless there are a lot of steps to becoming an officer.

     I don't think your average citizen realizes the training that one must go through to become a law enforcement officer.  Also I don't think people realize how much continuous training they must go through to keep up to date and well trained throughout their careers.

     I also wonder if people realize the great sacrifice that these men and women give everyday to keep our communities safe. I know we are all guilty of complaining about getting busted for speeding or what have you, but the truth is what would happen to our communities if we didn't have them. Something to think about.

    Well I'm am happy to say that soon my son will be home and we are going to celebrate his great accomplishment by having a party. We are going with a Mexican theme and I of course had to test out a recipe ahead of time to see if it was worth serving for the party.

      I found this recipe on facebook and I copied the recipe thinking that maybe I might make it sometime and then I got the bright idea of making it for the party. I just want to say that this fajita recipe is totally awesome. I don't think I'll ever make fajitas on the stove top again. This recipe is quick and easy. I made it with fully cooked frozen chicken from Aldis, but I'm thinking I could easily do this with the frozen beef for fajitas that I've see at Sam's Club.
Fresh out of the oven Chicken Fajitas

     I only slightly tweaked the recipe, but my family thought this was a winner. I hope you enjoy it.

Oven Baked Chicken Fajitas
1 pound fully cooked frozen chicken
2 T canola oil
2 t chili powder
1 1/2 t cumin
1/2 t garlic powder
1/4t seasoned salt
1 (15oz) can diced tomatoes, lightly drained
1/2 can (4oz) of diced jalapeno peppers
1 medium onion, sliced
1 green pepper, cut into strips

flour tortillas
sour cream

Directions
Preheat oven to 400 degrees. Place chicken into a greased 9x13 inch pan. In a small bowl combine oil, chili powder, cumin, garlic powder, and salt. Drizzle the spice mixture over the chicken and stir to coat. Next add the tomatoes, jalapenos, onion and green pepper and stir to combine.
Bake uncovered for 25 minutes or until chicken is cooked through and the vegetables are tender.
Serve in warm flour tortillas and top with sour cream.

Green chilies can be substituted for the jalapenos and red pepper can also be added or combined with the green peppers.

Tuesday, May 7, 2013

Salmon with Pecan-Honey Sauce

     I've been trying to eat less red meat these days. It seems that I'm eating chicken and fish mainly, but heavy on the chicken.  Now don't get me wrong I love chicken. It's easy to make and so versatile. Sometimes though I need to mix it up a bit.

     I have been trying to make shrimp a little bit more and I have been eating cod too. Although the cod I've been eating is a lightly breaded cod that one simply bakes in the oven. It's good though and we've used it to make fish tacos which were amazing.

     One of my other favorites is salmon. We always buy our salmon fillets at Sam's Club. It is the best salmon and so fresh. I have never been disappointed.

     One of my favorite ways to make salmon is to use this recipe I got from Simple & Delicious. It is also very easy to make. The original recipe has it being fried in a frying pan, but I have also cooked it on the grill. I am going to attach the original recipe, but don't be afraid to make the salmon on the grill.

Salmon with Pecan-Honey Sauce
      Make sure your salmon fillets are not too large. If they are too large they will not cook as evenly and you'll end up with uncooked salmon in the middle. I've learned this the hard way. Now I always make sure my fillets are a nice portion size.

     The recipe calls for toasted pecans, but I never toast them. I just chop up some pecans and toss them in the sauce while it cooks. I also melt the butter first then I add the honey and pecans and let it cook. Enjoy!

Salmon with Pecan-Honey Sauce
6 salmon fillets (6 oz each)
1/4 t salt
1/4 t pepper
1/4 C vegetable oil
3/4 C butter, divided
1 C coarsely chopped pecans toasted
1 C honey

Sprinkle salmon with salt & pepper. In a large skillet, cook salmon in oil and 6 Tablespoons for 10-12 minutes or until fish flakes easily with a fork.
     Meanwhile in a small saucepan, cook pecans and honey in remaining butter over medium-low heat for 8-10 minutes or until bubbly. Serve with salmon.

Monday, January 21, 2013

Wild Rice Soup

It has been extremely cold these past few days. The temperature is in the single digits. Throw in the wind and you have a wind chill of minus zero. I woke up the other morning to -13 degrees. I can't imagine what the chill was that morning.

It has been so cold that I haven't taken the dogs for a walk in days. I'm afraid it's too cold for them. I've just been taking them out in the backyard for a short time and my Sheltie is not very happy about it. She Loves her walks! I can't wait til we can go again too. There is something to be said for walking the stress of the day away and it's a great way to start the day.

Since the weather has been so cold and miserable. We've just been shut up in the house trying to keep warm. Of course we've had a fire in the wood stove like every night since Thursday. I don't know what I would do if we didn't have that stove.

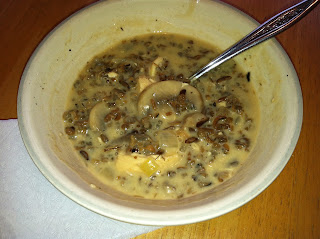
I also made some Wild Rice Soup the other night. There's nothing better than soup on a cold night. This soup is so good that you'll want to just keep on eating and eating and eating. 

Now this recipe originally was from the paper, but I've changed it over the years to suit me. It is really easy to make and truthfully I don't think it can be messed up it's that easy. If you have leftovers the liquid will get absorbed, but all you have to do is add some more chicken broth and some milk and you've got soup again.

The recipe calls for half n half, but sometimes I just use milk. It turns out just as good.

Wild Rice Soup


Wild Rice Soup
1 Cup raw wild rice
3 T butter
1  medium onion, chopped
8oz fresh mushrooms, sliced thickly
1/2 C flour
1-32 oz box of chicken broth
1 1/2 C diced cooked chicken, optional
1 C half n half
1 t worcestershire sauce
hot pepper sauce to taste ( I use Sriracha sauce)
salt and pepper to taste

Wash and drain the rice. Put in a saucepan with 5 cups of water. Bring to a boil, reduce heat and cover. Simmer about 45 minutes or until most of it has "popped". Drain well.
Cooke the chicken in boiling water until done. Set aside to cool. When cool cut into bite size pieces.
Meanwhile, melt the butter in a large saucepan. Add the onions and saute them over low-medium heat, stirring occasionally, until they become translucent. Add the mushrooms and saute, stirring occasionally until they yield their liquid and it's almost all cooked off.
 Add the flour, stir it into the onions and mushrooms and cook, stirring about 1 minute to heat the flour. Stir in the broth, making sure each addition of liquid is absorbed before more is added. Add the rice and chicken and heat through. Add the half n half, worcestershire sauce, hot pepper sauce, salt and pepper and heat through.

Sunday, January 20, 2013

Shrimp Stir Fry

Oh I've been absent for far too long!!

Sorry I've been absent for so long it's just that things have been a little 'off ' around my home these past few weeks. 

First it was the holidays, which just throws everything into utter chaos. Then it was trying to get back into the regular routine of work. But then throw in the fact that my daughter left at the beginning of January to study abroad in Thailand for 3 weeks and it was really a weird month for me.

It has been super hard to do any baking or cooking at my home for several reasons. 

One it was only my husband and I to cook or bake for. Well yes it's true my son did come home from college a few weekends, but he was more in the mood for going out to eat when he was home. He did a lot of hanging out with his friends which meant I did not do a lot of cooking when he was home.

Secondly, we are all recovering from over eating during the holidays. I hate to say it, but I'm just a little sick of eating. All I really want to eat right now is good nutritious food. I've been eating yogurt and fruit and lean cuisines on a regular basis these past few weeks.

And lastly, I've got no one to cook for during the week but myself. The husband is at work and with my daughter gone there was no one to eat the good stuff I would have cooked or baked.

Well last night was a different story. I decided to make some stir fry. I hadn't made it in a long time and I had some frozen shrimp in the freezer, so I decided it was time to make something that was tastey and healthy.

I love stir fry because you can vary it every time you make it. You can add what ever kind of meat you want. You can change up the vegetables too.

Usually I make chicken stir fry. I am always changing the vegies I use to whatever I have in the fridge. It's a good way to get in your serving of vegetables with this dish. The trick is to keep on stirring while you cook.

I've been making this dish for a long time and I no longer measure anything out so I'll give you my best guess at to how much I use of everything so that you too can enjoy this yummy dish.

Shrimp Stir Fry


Stir Fry
your desired meat (shrimp, chicken, beef)
3 T soy sauce
1 T vinegar
1/4 t ginger
Cut up meat and add the soy sauce, vinegar and ginger. Let it marinate while you prepare the rest of the ingredients.

3 carrots, peel and cut into coins
2 rods of celery, chopped
1 1/2 broccoli
1 1/2 cauliflower
1/2 medium onion, chopped
1 can mushrooms

1T cornstarch
water 
sugar

Put a tablespoon of oil in the wok and heat on high. Cook carrots and cauliflower for 3 minutes. Add the liquid from the mushrooms to the wok and cover. Let steam for 3 minutes. Remove vegies from wok. 
Heat up 1 tablespoon of oil and add broccoli, onion, and celery. Cook until onion looks translucent. Remove from wok and add to carrot/cauliflower. 
Heat up 1 tablespoon of oil and add meat. Cook meat until done. Add the vegies and then the mushrooms. 
Mix cornstarch and water to make a little paste. Add to the liquid in the wok. This will thicken the stir fry as you stir.  My little secret ingredient is sugar. I add about a tablespoon of sugar to the stir fry. Serve this with rice.